Tuesday, 13 October 2015

Epsom Salt for your Garden


In 1618, a farmer living in Epsom, England, noticed his cows would not drink water from one of his wells. He tasted the water and found it bitter. He also noticed that if he used the water to wash scratches on his skin, the scratches healed more quickly. He named the water Epsom salt after the town he lived in. 

Epsom salt is a popular and well-reputed supplement in organic gardening. Epsom salt is an affordable and green treatment for your indoors and outdoor plants. Epsom salt has been known as a wonderful garden supplement, helping to create lush grass, full roses, and healthy, vibrant & greenery.

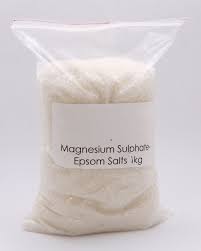
Epsom salt contains Magnesium and Sulphate.

Magnesium

Magnesium is beneficial to plants from the beginning of their life, right when the seed begins to develop. It assists with the process of seed germination; infusing the seed with this important mineral and helping to strengthen the plant cell walls, so that the plant can receive essential nutrients. Magnesium also plays a crucial role in photosynthesis by assisting with the creation of chlorophyll, used by plants to convert sunlight into food. In addition, it is a wonderful help in allowing the plant to soak up phosphorus and nitrogen, which serve as vital fertilizer components for the soil. 

Sulfate

Sulfate, a mineral form of sulfur found in nature, is an equally important nutrient for plant life. Sulfate is essential to the health and longevity of plants, and aides in the production of chlorophyll. It joins with the soil to make key nutrients more effective for plants, including nitrogen, phosphorus and potassium. Sulfate works in conjunction with Magnesium to create a "vitamin" full of minerals, nourishment and health benefits for your garden.

For potted plants, simply dissolve 2 tablespoons per 4-5ltr of water, and substitute this solution for normal watering at least once a month – although it is safe to do this as often as desired.

Simply fill your tank sprayer (commonly available at gardening and home improvement stores) with 1 tablespoon of Epsom Salt per 4-5 ltr of water. Then spray your garden after the initial planting, later when it begins to grow (or after a month or so for transplants)
, and lastly when the vegetables begin to mature.

Tomatoes and peppers are prone to magnesium deficiency later in the growing season, and display this through yellow leaves and less production. They can greatly benefit from Epsom Salt treatments both at the beginning of their planting and throughout their seasonal life.

Likewise you can do it for flowering plants especially to roses. For roses sprinkle about 1/2 cup of Epsom salt into the soil near the base of each rose bush. For foliar feeding  mix 1 tablespoon of Epsom salt into 5 ltr of water and apply to rose plants every alternate weeks. This could help prevent garden pests, and roses could grow bushier and produce more abundant, bright blooms.

Leaf Miners Control

Those white curl lines are a trademark of leaf miners. Leaf miners are insect larvae (Liriomyza munda) which hatch from eggs deposited between the upper and lower surface of plant leaves. The hungry larvae munch their way around the leaf, leaving a telltale white trail or tunnel. Tunnels can provide an entry point for fungus or bacteria if the leaves are not removed.


Here are some tips for Controlling the leaf miners:

LEAF MINERS LIFE CYCLE
• Monitor plant leaves closely. At the first sign of tunneling, squeeze the leaf at the tunnel between two fingers to crush any larvae. Done soon enough, this killing larvae can allow plants to survive minor outbreaks.

• Pick off and destroy any affected leaves and leaf miner larvae.

• Grow your veggies organically, without the use of sprays or chemicals that could upset the balance of beneficial predator insects, since leaf miners can be largely controlled by natural predators.

• Keep your plants healthy and well watered, so they can recover from the infestation (and the necessary leaf-plucking).

• Keep your garden clean and free of weeds or debris that can harbor insects and diseases.

• Neem spray in regular interval may control this problem.


Sources: various internet sites and books

Wednesday, 30 September 2015

DIY Kit News

As per the information collected from the Officer, Horticulture Department TN Govt., there is no confirmed order from the government regarding issue of DIY Kit and the procedure. I will update on this issue next week I.e. 1st week of Oct. 2015


Date: 30-11-2015

DIY Kit is being issued at Gov horticulture department office, Madhavaram milk colony, Madhavaram

Contents of one kit worth Rs 500.

1.  GROW BAG WITH COCOPEAT 2 KG BLOCK -6 NOS. 
2. SEEDS BHENDIARAKEERAI.MULAIKEERAI. SEDI AVARAI. RADDISH. PALAK KEERAI. CORIANDER )
3. AZOSPIRILLUM 200GM. 
4. PHOSPHOBACTEREA 200 GM
5. PSEUDOMUNAS 100GM. 
6. TROCODERMAVIRIDI 100GM
7.  WATER SOLUBLEFERTILIZER 1 KG. 
8. NEEM OIL 100 ML. 
9. PAMPHLET 

Tuesday, 29 September 2015

How to get rid of Ants


Even though ants play a critical role to the environment, ants can also become pests as well when they invade your garden in large numbers seeking shelter and food. An ant invasion is the last thing you might want in your garden as this can really have some very serious consequences. In most cases, gardeners will reach out for intense chemicals and pesticides to eradicate them. Pest control using chemicals is potentially harmful and it is essential that you think about alternative ways of getting rid of ants from your garden. Ants however do good things to the environment to some extent such as eating the larva of spiders, fleas, fleas, bed bugs, clothes months and silverfish. So, while you are planning to get rid of ants from your garden, it is essential that you consider controlling them rather than complete elimination. For the ants that you need to get rid off from your garden, there are some natural, effective and easy ways of warding them off from your garden. These offer you a more economical, environmentally friendly approach of getting rid of ants and ensuring that your garden stays ant free as described here below:

1. Use Vinegar

Ants use their antennae to perceive smells which helps them determine not only the direction of the scents but also its intensity as well. If forager ants find food in your garden, they will mark a trail which leads them to the colony and many other ants follow the trail to access the food. By making use of white vinegar on the paths that you know are followed by the ants, you will be able to disrupt their scent trains. This makes it quite hard for them to be able to travel back to the source of food they have been invading in your garden. To do so, just mix the vinegar with some water and spray around your garden everywhere you find the ant trails.


2. Use sidewalk chalks

If you are a keen observer, you might have seen that ants do not mix with sidewalk chalk. As such, this gives you a natural solution to keeping the ants at bay from your garden. When ants stumble on the chalk, the white stuff covers them on their body. It is also said that the minerals found in the sidewalk chalk like talc kills the ants and thus offering you an ideal way of eliminating the ants from your garden. However, this option is more effective when it is combined with another method.


3. Ant honey plates/pots

Getting rid of ants from your garden completely might not always be an easy thing as most of the methods you could be using to exterminate them might not just be working. In such a case, a better idea would be try diversion which might probably work to your favor. If the colony seems to have set up a camp at your home, diversion can help minimize their disastrous effects on your garden. By laying a honey plates/pots somewhere else, the ants will know that they have a much better source of food than struggling to get some from your garden. Once you clean up their scent trails and use some deterrent on the entrances, you can be sure that the ants will stay for a long time without creeping back to your garden.


4. Using essential oil entrance blockers

Ants are known to dislike strong smells very much because they greatly mess up their communication and scent trails. As if this is not enough, essential oils cover their bodies when they are crawling through it and you can take advantage of this to get rid of ants from your garden. It is even advisable that you try experimenting with different blends of oils to find out which ones works best in your garden. Focus more on spraying the essential oil on the entrance areas which ants use when finding their way into your garden. Keep repeating as the scent continues to fade and you will be able to keep them at bay from your garden.


5. Ant balls

When it comes to a point where spraying the essential oil solution doesn't seem to work, it is essential that you think about busting the ant balls out. Use of cotton balls as a barrier for keeping away ants from your home can be very effective. However, place the cotton balls in a place in your garden where your pets will not see them as a snack and feast on them.


Items Needed

1/2 cup of sugar

1 1/2 tablespoons Borax(Borax, also known as sodium borate, sodium tetraborate, or disodium tetraborate, is an important boron compound, a mineral, and a salt of boric acid. Powdered borax is white, consisting of soft colorless crystals that dissolve easily in water)

1 1/2 cups warm water

Cotton balls or paper towel

Instructions

1. Mix the Borax and sugar together until well combined.

2. Add the mixture to your warm water and mix constantly until the powder has been completely dissolved.

3. Seal the mixture in a jar or container for future use, and use only what you need in the next steps (and save the rest).  It is important that you clearly label the jar, as it will just look like water.  Do not leave this where children can get to it.  (Because this is such an easy solution to make, however, I only kept what I made until after the ants had been gone for a week or more.)

4. Fill some jar lids, milk caps, or other shallow containers with cotton balls or a wad of paper towel.

5. Add the sugar-Borax solution to the prepared lids making sure to soak the cotton balls (or paper towel).


6. Use boiling water and soap

Sometimes, the only way to keep your garden free of ants is by   killing them. If you realize that there is a big nest of ants at your garden, killing them instantly might be the most ideal way. In this regard, use of hot water is the most effective way to eradicate such ants in a non toxic way.


7. Avoid storing unused red soil


Final tip is not to store unused red soil in your garden area.  Ants like red soil very much to make their homes.


8. Other googled recipes

In  a blender add 4-5 hot peppers along with vinegar and dish soap.  Then strain the ingredients. Now add vegetable oil to the mix and shake well to emulsify it. Add required amount of water and spray on the ants. That's it.  But see that you should not spray on plants.

Please leave your comments which recipe has worked you well to benefit other user.


Source: Various internet sites. books & personal experience

Thursday, 24 September 2015

Importance of Nitrogen and fixation

Your garden is not growing as well as it use to and some of the plants in the garden are starting to look a little yellow. You suspect a nitrogen deficiency in the soil, but you are unsure how to correct it. "Why do plants need nitrogen anyway?" you may be wondering.

Nitrogen as a plant fertilizer is essential to proper plant growth. Without nitrogen, a plant cannot makes the proteins, amino acids and even its very DNA. This is why when there is a nitrogen deficiency in the soil, plants are stunted. They simply cannot make their own cells. In order for plants to use the nitrogen in the air, it must be converted in some way to nitrogen in the soil. This can happen through nitrogen fixation, or nitrogen can be "recycled" by composting plants and manure.

Organically Fixing a Nitrogen Deficiency in the Soil:

To correct a nitrogen deficiency using organic methods requires time, but will result in a more even distribution of the added nitrogen over time. Some organic methods of adding nitrogen to the soil include:

Adding composted manure to the soil

Planting a green manure crop

Green manure is a term used to describe specific plant or crop varieties that are grown and turned into the soil to improve its overall quality. A green manure crop can be cut and then plowed into the soil or simply left in the ground for an extended period prior to tilling garden areas. Examples of green manure crops include grass mixtures and legume plants. Some of the most commonly used are:

⁃ Annual ryegrass
⁃ Vetch
⁃ Clover
⁃ Peas
⁃ Beans
⁃ Borage
⁃ Mulch with leaves

Adding coffee grounds to the soil - Coffee grounds are about 2 percent nitrogen by volume, making them an excellent addition togarden soil.

Grass clippings are a free and easy way to add nitrogen and potassium to the soil.


Source : Various internet sites & books

Wednesday, 23 September 2015

Tomato Growing

Tomatoes (Lycopersicon esculentum) are the most popular home garden crop in the country. Highly adaptable and easy to grow, tomatoes can thrive in a wide range of climates and conditions. Of course, like any garden vegetable, tomatoes need the right type of soil to produce the best crop.

Types and Textures

Loam and sandy loam soils are best for tomato production, but these plants will grow in almost all soil types except heavy clay. If your soil has lots of clay, you can improve the texture by tilling the soil and incorporating sand, sawdust, peat moss or other amendments before planting. The soil should be fairly loose and well-drained. Tomatoes don't do well in dry soil, but avoid planting them in excessively wet, waterlogged soil, or anywhere standing water gathers after a rain.

Soil pH

The pH scale is used to characterize the acidity or alkalinity of your soil. When starting a new garden, it's best to start with a soil test. You can purchase home pH testers from the market that are adequate for determining your soil's pH level, if you don't want to send it out for testing. Most soils are slightly acidic, that is, slightly less than pH 7, which is neutral.


Tomatoes grow best in soils that are just slightly acidic, from a pH of 5.5 to 6.8

It's not difficult to modify your soil's pH level. To know more about how to alter your soil pH click here.

Germination

First select the tomato seeds which suits to your locality. Place the seeds in a paper cups and cover them with a loose layer of dry soil. You can also use seedling trays.


Alternatively you can cut the ripe tomatoes in slices and place it in a grow bag/pots and cover them with lose layer of dry soil.


Sprinkle water on it for a few days and you will see the seedlings sprouting. Once they are over an inch tall, cut the paper cup away and replant the seedlings in the pots you have prepared. Plant only one seedling per pot.

Sun Light and Watering

Keep your tomato plant to a place where the sunlight is available in plenty. The fruit formation equires at least 5-6 hours of direct sunlight.

Tomato plant requires plenty of water specially during summers. Do not wet the leaves or the stem of the plant. Always put water directly into the soil near the roots. Tomatoes are particularly susceptible to many pests and diseases. Horn-worms, Aphids, white-flies are few of the pests which can reduce the production of tomatoes. Late blight(specially during monsoon) and distorted leaves are the common diseases to the plant. It is always wise to plant basil, marigold, lettuce, onion, garlic etc. along with your tomato plant. It will help in distracting little pests from your tomato plant. This type of planting is called companion planting.

Support

Tomato plants need support for growth. You need to build cage or stakes at the time of planting. Staking keeps fruits off the ground whereas cage help the plant to hold its upright.

Improving Fruit Growth

Take out any shoot that grows between the stem and main branches, these shoots always hinder the fruit growth. With the same logic cut off the top of the plant if it grows vertically. It will help the plant to become more bushy with much more fruits. It is not necessary to do this. It depends upon the type of plants you grow.


Mulching

Mulching is simply spreading a protective layer of a material on top of the soil. Mulches can either be organic -- such as leaves, grass clippings, straw, bark, and similar materials -- or inorganic -- such as stones, brick chips, and plastic. For long term soil improvement use organic mulches, which have numerous benefits. It retards weeds, helps retain moisture, and most importantly improves the soil condition as it slowly breaks down, loosening the soil and adding nutrients.


Tomato Blossom Drop


Blossom drop is the loss of flowers. This is usually preceded by the yellowing of the pedicel. A tomato flower has both male (stamens) and female (pistil) parts within the same flower. The yellow stamens wrap around the greenish pistil in the center of the flower. Under proper conditions, pollen from the stamens transfers to the sticky stigma or tip of the pistil. This transfer requires a jarring wind or a flick of the finger or insects such as bumble bees and other native bees.

Tomato blossoms are self fertile, and a certain amount of self pollination of tomato flowers does occur. But pollen does not move well by itself from anther to stigma, as evidenced by the really poor pollination seen in greenhouses when no pollination aid is given. But shaking by wind or mechanical means can cause the release of the pollen, which drops down (the blossoms normally hanging downward) through the stamen tube to the stigma. The best possible motion to release this pollen is from a bee that "sonicates" Sonication is the vibration of the wing muscles without flight, causing the whole flower to vibrate, and a cloud of pollen to be released onto the bee's body and at the same time, onto the stigma.


Without pollination, which stimulates fruit set, the flower withers and dies.


Tomato plants lose their blossoms for several different reasons:
Environmental causes:
1. Temperature: Extreme temperature such as high daytime temperatures (above 85 o F/29 o C), or high nighttime temperatures (above 70 o F/21 C), or low nighttime temperatures (Below 55 o F/13 o C) tomato plants will drop the flowers. Tomatoes grow best if daytime temperatures range between 70 o F/21 o C and 85 o F/29 o C. 

2. Humidity: The ideal humidity range is between 40 70%. If humidity is either too high or too low, it interferes with the release of pollen and with pollen’s ability to stick to the stigma. So pollination will not occur. If humidity is too low, hose the foliage during the day. This will both cool the plant and raise the humidity. This is not recommended in areas with high humidity or when fungus diseases are present.

Other potential sources of blossom drop:

1. Lack of pollination
2. Nitrogen: High or low application rates of N fertilizer can cause blossom drop.
3. Lack of water: Tomatoes have very deep roots, and can sometimes reach down up to 5 feet. Shallow watering will stress and weaken the plants.
4. Insect damage or disease
5. Heavy fruit set: When a tomato plant has too many blossoms, the resulting fruits are all competing for the limited food supplied by the crop. The plant will automatically abort some flowers. Once the initial crop is harvested, the problem should subside.


Source : Compiled from various gardening sites, books & learned from personal experience.


Saturday, 19 September 2015

Raising or Lowering the pH in the Soil Mix

Growing in soil and adjusting pH levels

A lot of gardeners have trouble with the pH of their soil. A high pH can lock out needed nutrients and mimic other problems like Fe and Mg deficiencies. The biggest mistake new growers make is to try and correct pH problems too quickly. The first step in determining if high pH is the real problem, is to pick up a good pH tester. Don't be afraid to shell out the cash for a good one, it's well worth it!

What is pH, and what do the terms acidic and alkaline mean?

The acidity or alkalinity of the soil is measured by pH (potential Hydrogen ions). Basically it's a measure of the amount of lime (calcium) contained in your soil, and the type of soil that you have. A soil with a pH lower than 7.0 is an acidic soil and one with a pH higher than 7.0 is considered to be alkaline. A pH of 7.0 is neutral.

Adjusting your soil pH :

Once you have determined the pH of your soil with a good tester, you can amend the soil if needed to accommodate the plants in your garden using inexpensive materials commonly available at your local garden center.

Adjust soil pH slowly over several days time, and check pH often as you go. Radical changes in pH may cause osmotic shock damage to the roots.

Raising soil pH : (to make it more alkaline)

It is generally easier to make soil mixes more alkaline than it is to make them more acidic. The addition of dolomite lime, hardwood ash, bone meal, crushed marble, or crushed oyster shells will help to raise the soil pH.

In soil: add dolomite limestone to the soil; use small amounts of hydrated lime.

Raising hydroponic pH : (to make it more alkaline)

In hydroponics: use potassium silicate, provides silicon at an effective dosage. In bioponics/hydro-organics: add small amounts of sodium bicarbonate or lime.

Lowering soil pH : (to make it more acidic)

If your soil needs to be more acidic, sawdust, composted leaves, wood chips, cottonseed meal, leaf mold and especially peat moss, will lower the soil pH.

bloodmeal/cottonseed meal during vegetative; bonemeal during flowering.

Lowering hydroponic pH : (to make it more acidic)

In hydroponics: use nitric acid during vegetative; phosphoric acid during flowering.

Stabilizing pH with Dolomite lime:

The best way to stable pH is by adding 30 gms of Dolomite Lime to around 5 kg of planting soil. Buy the fine Dolomite powder (There may be several kinds of Dolomite like Rough, Medium, Fine) Dolomite Lime has been a useful pH stabilizer for years, since it has a neutral pH of 7 when added to your soil it stabilizes your soil at pH 7.Mix the dry soil medium and dolomite together really well, give the mix a good watering then after the water has had chance to settle and leech into the soil a bit give the mix a really good stir. Then water the soil/lime mix and give it another stir. Best plan is to mix fine dolomite lime into your mix before planting. Fine Dolomite will help stabilize your pH; however, if the ph becomes unstable or changes, you can then use Hydrated Dolomite Lime. Add some of the hydrated lime to luke warm water and give it a good stir then water your plants with it. Give the plants a good watering with this hydrated lime added and your pH should fall or rise back to 7.

Dolomite lime is also high in two secondary nutes that can often be overlooked by fertilizers; dolomite is high in both (Mg) Magnesium and (Ca) Calcium.